 (1).png)


- Login
- Register
Peel & Stick Stone Veneer
Peel & Stick Stone Veneer

Before you begin
Installing peel & stick stone tiles is a simple, exciting project that adds instant style to your kitchen, bath or tv wall.. We have deliberately over-explained the tile installation. Have fun with this project. It’s going to be easy and look great!
Read this installation manual in its entirety before you start. If you have doubts about doing this installation, you should contact a qualified contractor, carpenter or professional installer. Visit www.Lifestone.in for FAQs, photos and additional information.
Due to the natural variance of real stone, we cannot guarantee an exact color or texture match from lot to lot. Prior to adhering tiles to your wall, please unpackaged & lay out all purchased product to ensure color and texture consistency. If you encounter unreasonable variation, please give us a call so that we may assist you with your project.
PROPER SURFACE PREPARATION IS ESSENTIAL FOR A SUCCESSFUL PROJECT Failure to follow recommended surface preparation instructions may void the warranty. Life Stone is not responsible or liable for any labor costs or damaged product incurred as a result of improper installation.
Installation Methods
Method 1
The adhesive on the back side of the stone tiles is engineered to stick to flat, primed, smooth walls. Allow the tiles and substrate to come to room temperature (65°F to 100°F) before installation. Use a heat gun or other source to warm the tiles and substrate if necessary. If you are using installation Method 1, proper wall preparation is required. stone tiles can be installed over most structurally sound substrates if they are clean, flat, smooth, dry, and free of dust, wax, soap scum and grease. Acceptable substrates are drywall, plaster or clean, smooth tile (glazed, porcelain type tile; not porous or textured). Any damaged, loose or uneven areas must be repaired, patched, leveled and primed. Fill cracks and irregularities with wallboard compound or spackling, then sand smooth with fine-grade sandpaper.
Method 1 – The adhesive on the back side of the tiles is engineered to be aggressive and pressure-sensitive
The substrate to which you are applying tiles must be primed with a fresh coat of latex primer. Ingredients in “paint & primer in one” products can cause adhesion failure; as such, be sure to use a stand-alone primer See below for Method 2 if you prefer not to prime the surface. Occasionally, even after properly preparing the substrate, the surface can still have bows, high spots, ridges, or uneven areas. Place a level against the wall. If there is a 1/8″ gap or greater, use a filler such as spackling or drywall compound to fill in imperfections.
Method 2
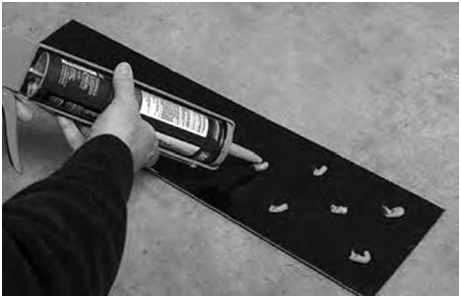
If you do not intend to prepare, sand and prime the surface, an additional adhesive should be used. We recommend a high-quality polyurethane construction adhesive be applied to the back of each tile in these cases. Be sure to remove the release film on the back of each tile before applying additional adhesive. Apply some pea-sized dots of adhesive to the back of a full tile (see right). Keep the adhesive a half-inch from the edges. Firmly press the tiles into place. If adhesive squeezes out around the tiles, be sure to wipe it off before it dries.
Method 2 – Using high-quality polyurethane construction adhesive
Layout
Measure the first area to be covered by material. We recommend you lay out the entire project on a flat surface, like the counter top, a table or the floor, before adhering to the substrate, to be sure you have enough tiles and your design and layout is correct. This will also give you good reference as to how the tiles will look on your wall. As each project is different, be sure to plan for cutouts, corners or edge treatments before applying tiles. Tile edge seams will be less visible if they are not aligned. When starting a new row, we recommend either a random staggered pattern or a subway pattern. See illustrations below.
|
Staggered
|
Subway
|
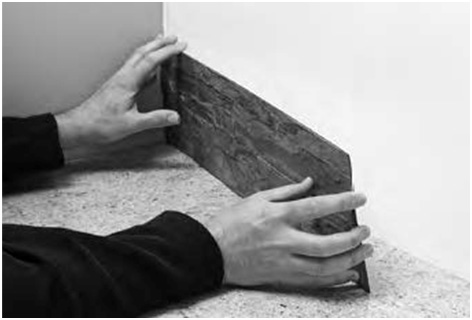
One popular layout method is to begin from the inside corner of your counter and work across left to right. This method allows you to use two points of reference, your vertical wall and horizontal counter top. Note – when using these two points of reference, be sure to check them for level on the horizontal plane and 90° on the vertical plane. This will prevent any problems as you build your backsplash. Lay a 4-foot level on top of your counter top or backsplash return lip. If the counter top is level and straight, begin tile installation as described below. If your counter top is not level and straight,
Installing your first tile
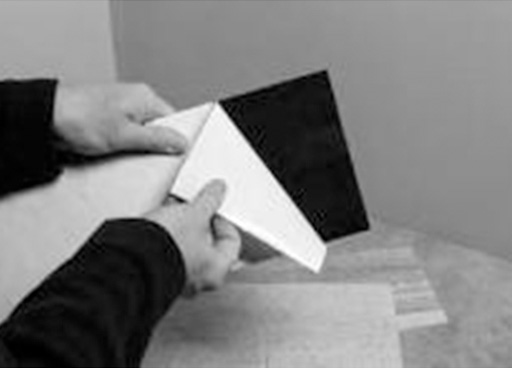
Here’s where the fun begins. Be sure the substrate is clean and dry. Remove the adhesive liner from the back of the matted tile. As you begin to place the first tile, Angle the top of the tile (or one side) away from the wall so the tile does not stick before you are Ready. See images below. Do not apply pressure to the tile until you are sure of your placement. If alignment is true, apply pressure to the whole tile.
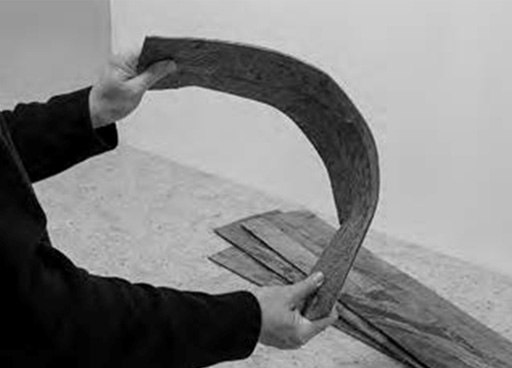
Do not bend tiles backward as it could permanently damage the tile.
The aggressive design of the adhesive does not allow for repositioning after the tile has been pressed in place. If the tile is affixed but not aligned properly, see the Removing Tiles section, below.
The aggressive design of the adhesive does not allow for repositioning after the tile has been pressed in place. If the tile is affixed but not aligned properly, see the Removing Tiles section, below.
1) Place the first tile. Angle side or top of tile away from wall until you are sure entire installation. of placement. Use the counter top as a guide as you move it into place. same way you |

2) Leave adhesive backing on to “dry fit” the next piece throughout the If you are satisfied with the dry fit, remove liner and apply the next tile the did the first one. |

3) When placing tiles on the second row and beyond, angle the tile back about 30 degrees and rest the bottom edge on the tile below, then slide it over to butt previous tile. |

4) Carefully tip it up into place so it butts the last tile, then carefully install the tile while making sure the bottom edge is fitting tightly against the the lower tile. |
Cutting Tiles
If cutting tiles is necessary, use one of our recommended tools and methods listed above. A large tin snip is the recommended cutting tool. Alternative cutting methods include a table saw or chop saw for any necessary straight cuts. Use a combination of a snip and chisel for cutting notches out for various cutouts needed, such as an electrical outlet. Leave on the adhesive liner for measuring, drawing lines and cutting tiles. Measure and layout on a tile where the cut must be made and cut the tile. Take the cut tile (adhesive liner still on tile) to the work space and place it in its intended location, ensuring it fits properly. Cut and install all remaining tiles using the same steps described above. When tiles are installed to your satisfaction, press each again firmly with your hand. This will ensure that the adhesive bonds to the substrate.
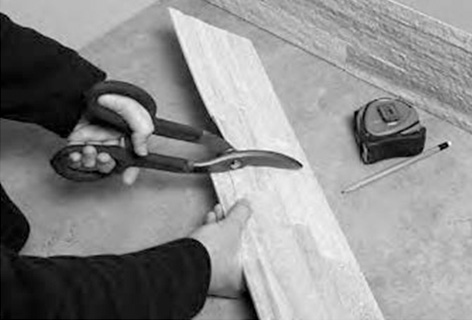
Cutting a straight cut with a snip |
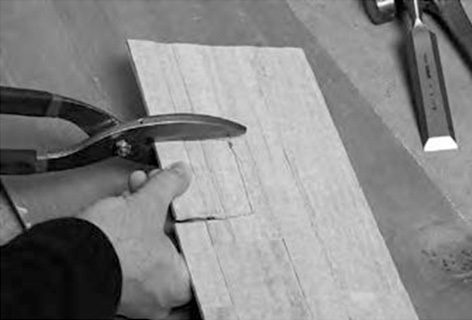
Starting a notch using a snip |
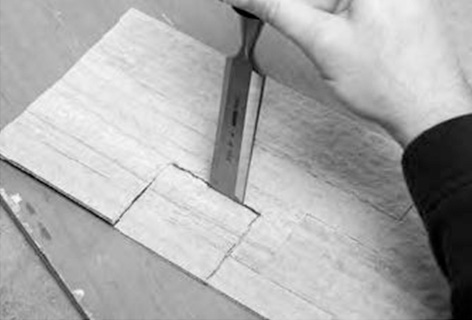
Cutting the inside edge with chisel |

Finished notch cutout |
Adhering small pieces
Use tube adhesive for small cut pieces of stone that are less than 4 inches by 4 inches.
Removing tiles
If a tile needs to be removed, apply heat with a hair dryer to soften the adhesive. Use a putty knife on the back side and slowly apply outward pressure to release the tile from the wall. The adhesive is engineered to not be removed so caution should be taken to not damage the wall. Any removed tiles may be unusable. Life Stone is not responsible or liable if you damage your walls. If the adhesive is destroyed but the tile face is fine, you can try using adhesive to reapply the tile.
Care after Installation
As with all natural stone products, there is some inherent risk of staining. Stone sealers or impregnators can provide protection against stains.